みんな大好きGoogleアドセンス。
よく、記事の中に広告が何回も挿入されてるブログってあるじゃないですか。
あれってWordPressだとどうやるのかなーと調べたところ、見つけたコードが冗長だったので手直しして追加してみました。
細かいことはいいからコード見せろ!!という場合は「修正済み全コード」を見てください。
目次
WordPressにGoogleアドセンスを自動挿入する
参考にしたコード
こちらを参考にしました。
記載されている、複数のアドセンスを追加するコードがこちら
|
1 2 3 4 5 6 7 8 9 10 11 12 13 14 15 16 17 18 19 20 21 22 23 24 25 26 27 28 29 30 31 32 33 34 35 36 37 38 39 40 41 |
// 本文中にアドセンス表示 function add_ads_before_h2($the_content) { if (is_single()) { $ads = <<< EOF <p>スポンサードサーチ</p> 【【【ここにアドセンスコードを貼り付けます】】】 <div style="clear:both"></div> EOF; $h2 = '/^.+?<\/h2>$/im';//H2見出しのパターン if ( preg_match_all( $h2, $the_content, $h2s )) { if ( $h2s[0] ) { // 1つ目のh2見出しの上にアドセンス挿入 if ( $h2s[0][0] ) { $the_content = str_replace($h2s[0][0], $ads.$h2s[0][0], $the_content); } // 3つ目のh2見出しの上にアドセンス挿入 if ( $h2s[0][2] ) { $the_content = str_replace($h2s[0][2], $ads.$h2s[0][2], $the_content); } // 5つ目のh2見出しの上にアドセンス挿入 if ( $h2s[0][4] ) { $the_content = str_replace($h2s[0][4], $ads.$h2s[0][4], $the_content); } // 7つ目のh2見出しの上にアドセンス挿入 if ( $h2s[0][6] ) { $the_content = str_replace($h2s[0][6], $ads.$h2s[0][6], $the_content); } } } } return $the_content; } add_filter('the_content','add_ads_before_h2'); |
へー。
こんな感じで追加できるんだー。
しかし、長い、長いよ!
記事内にh2が9つ以上ある場合はさらにコード追加しなきゃいけないじゃん!!
奇数番目のh2の上にGoogleアドセンスを自動挿入する
各h2毎にif文を追加している部分をループ処理させます。
|
1 2 3 4 5 6 7 8 9 10 11 12 13 |
$h2 = '/^.+?<\/h2>$/im';//H2見出しのパターン if ( preg_match_all( $h2, $the_content, $h2s )) { if ( $h2s[0] ) { for ($i = 0; $i < count($h2s[0]); $i++) { if ( $i == 0 || $i % 2 == 0 ) { if ( $h2s[0][$i] ) { $the_content = str_replace($h2s[0][$i], $ads.$h2s[0][$i], $the_content); } } } } } |
配列の添え字は0始まりなので、奇数番目のh2は添え字が2,4,6などの偶数になります。
$i % 2 == 0
で、2で割った余りが0だったら偶数なので処理。
0を割るとエラーが出る(と思われる)ので、
$i == 0 || $i % 2 == 0
のようにしています。
修正したコードを外観 > テーマの編集 > function.phpに貼れば、奇数番目のh2の上にGoogleアドセンスが表示されます。
Googleアドセンスの表示をCSSで調整する
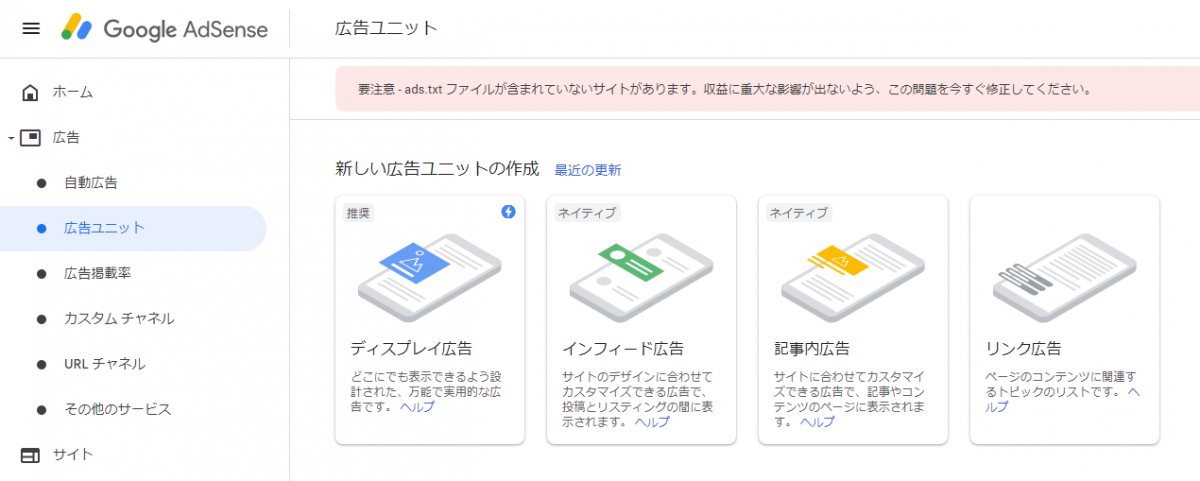
コード内に挿入するGoogleアドセンスコードは、広告ユニットで取得できます。
今回はWordPressの記事内に記載するということで、記事内広告にしてみました。

作成されたコードがこちら。
|
1 2 3 4 5 6 7 8 9 10 |
<script async src="https://pagead2.googlesyndication.com/pagead/js/adsbygoogle.js"></script> <ins class="adsbygoogle" style="display:block; text-align:center;" data-ad-layout="in-article" data-ad-format="fluid" data-ad-client="ca-pub-xxxxxxxxxxxxxxxxx" data-ad-slot="xxxxxxxxxx"></ins> <script> (adsbygoogle = window.adsbygoogle || []).push({}); </script> |
こいつをアドセンスコード部分に張り付けるんですが
|
1 2 3 4 5 6 7 |
$ads = <<< EOF <p>スポンサードサーチ</p> 【【【ここにアドセンスコードを貼り付けます】】】 <div style="clear:both"></div> EOF; |
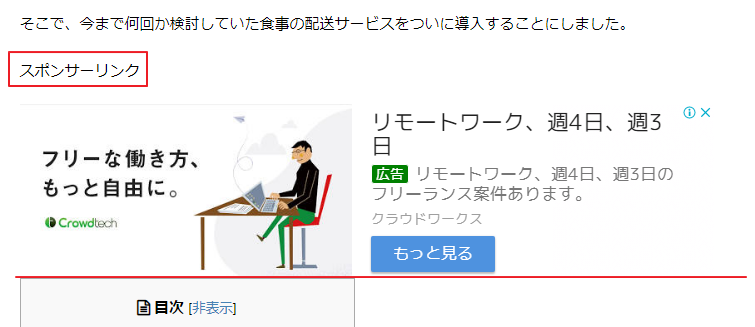
そのままだとレイアウトの調整ができないのでちょっと不便です。
そこで、以下の修正をしたいと思います。
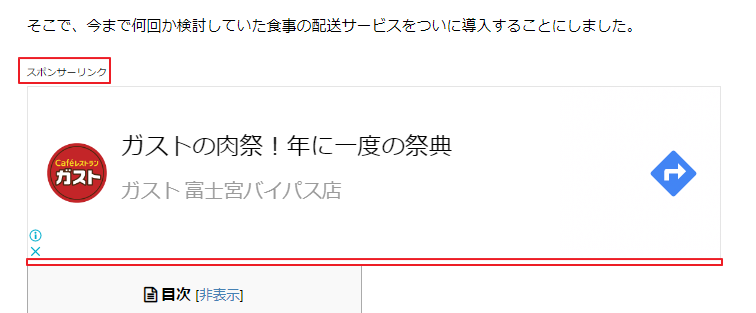
- スポンサーリンクの文字列を小さくする
- Googleアドセンスと目次の間にスペースを追加する

張り付けるアドセンスコードをちょっと手直し。
- <div class="h2_adsense">で囲む
- pタグにclass="h2_adsense"を追加する
|
1 2 3 4 5 6 7 8 9 10 11 12 13 14 15 16 |
$ads = <<< EOF <div class="h2_adsense"> <p class="h2_adsense">スポンサーリンク</p> <script async src="https://pagead2.googlesyndication.com/pagead/js/adsbygoogle.js"></script> <ins class="adsbygoogle" style="display:block; text-align:center;" data-ad-layout="in-article" data-ad-format="fluid" data-ad-client="ca-pub-xxxxxxxxxxxxxxxxx" data-ad-slot="xxxxxxxxxx"></ins> <script> (adsbygoogle = window.adsbygoogle || []).push({}); </script> <div style="clear:both"></div> </div> EOF; |
調整内容はブログに合わせて変えてください。
|
1 2 3 4 5 6 7 8 |
div.h2_adsense{ padding: 0px 0px 5px 0px; } p.h2_adsense{ font-size: 60%; margin-top: 0px; margin-bottom: 0px; } |

ちなみに、「スポンサーリンク」という文言はGoogleアドセンスの規約で決められています。
AdSense の広告ユニットには、「広告」と「スポンサーリンク」のいずれかのラベルを表示できます。他の種類のラベルは、現時点では許可されません。詳細については、広告のプレースメントに関するポリシーをご覧ください。
規約に違反するとGoogleアドセンスを止められてしまう可能性があります。
一回停止された場合、二度と復活しない(他のアカウントを作ってもダメ)という噂なので気を付けましょう。。。
修正済み全コード
外観 > テーマの編集 > function.php
|
1 2 3 4 5 6 7 8 9 10 11 12 13 14 15 16 17 18 19 20 21 22 23 24 25 26 27 28 29 30 31 32 33 34 35 36 |
// 本文中にアドセンス表示 function add_ads_before_h2($the_content) { if (is_single()) { $ads = <<< EOF <div class="h2_adsense"> <p class="h2_adsense">スポンサーリンク</p> <script async src="https://pagead2.googlesyndication.com/pagead/js/adsbygoogle.js"></script> <ins class="adsbygoogle" style="display:block; text-align:center;" data-ad-layout="in-article" data-ad-format="fluid" data-ad-client="ca-pub-xxxxxxxxxxxxxxxxx" data-ad-slot="xxxxxxxxxx"></ins> <script> (adsbygoogle = window.adsbygoogle || []).push({}); </script> <div style="clear:both"></div> </div> EOF; $h2 = '/^.+?<\/h2>$/im';//H2見出しのパターン if ( preg_match_all( $h2, $the_content, $h2s )) { if ( $h2s[0] ) { for ($i = 0; $i < count($h2s[0]); $i++) { if ( $i == 0 || $i % 2 == 0 ) { if ( $h2s[0][$i] ) { $the_content = str_replace($h2s[0][$i], $ads.$h2s[0][$i], $the_content); } } } } } } return $the_content; } add_filter('the_content','add_ads_before_h2'); |
外観 > カスタマイズ > 追加CSS
|
1 2 3 4 5 6 7 8 |
div.h2_adsense{ padding: 0px 0px 5px 0px; } p.h2_adsense{ font-size: 60%; margin-top: 0px; margin-bottom: 0px; } |

