前回の続き。
-

-
FlutterでTwitterクライアント作成⑦細かい修正いろいろ
前回の続き。 タイムラインに画像を表示する!! 予定でしたが、その前にいろいろと細かい修正が必要そうだったのでまとめて。 目次1 いいね・リツイートが0の時はラベルを空欄にする1.1 三項演算子を追加 ...
続きを見る
今回はタイムラインに画像を表示させます。
いろいろ試行錯誤してどうにか完成。
LocalのJsonファイルを読み込めるようにする
Twitter APIで情報を取得してもいいけど、画像3枚とかあんまりないのでJsonファイルでテストデータを作ることにしました。
Jsonファイルを作成する
リファレンスと実際に返ってくる値を参考にテストデータを作りました。
実際に使う値だけしか書いてません。
jsons/timeline.jsonに以下を記載。
|
1 2 3 4 5 6 7 8 9 10 11 12 13 14 15 16 17 18 19 20 21 22 23 24 25 26 27 28 29 30 31 32 33 34 35 36 37 38 39 40 41 42 43 44 45 46 47 48 49 50 51 52 53 54 55 56 57 58 59 60 61 62 63 64 65 66 67 68 69 |
[ { "created_at" : "Wed Oct 10 20:19:24 +0000 2018", "text" : "画像4枚", "user" : { "name" : "ユーザー名", "screen_name" : "スクリーン名", "profile_image_url_https" : "http://nekodeki.com/wp-content/uploads/2020/03/logo_flutter.png" }, "entities" : { "media" : [ { "media_url" : "http://nekodeki.com/wp-content/uploads/2020/02/P6260391-2.jpg", "url" : "http://nekodeki.com/wp-content/uploads/2020/02/P6260391-2.jpg" } ] }, "extended_entities" : { "media" : [ { "media_url" : "http://nekodeki.com/wp-content/uploads/2020/02/P6260391-2.jpg" }, { "media_url" : "http://nekodeki.com/wp-content/uploads/2020/02/P6260336.jpg" }, { "media_url" : "http://nekodeki.com/wp-content/uploads/2020/02/P6260241-2.jpg" }, { "media_url" : "https://nekodeki.com/wp-content/uploads/2020/01/PB150607.jpg" } ] }, "retweet_count" : 5, "favorite_count" : 10 }, { "created_at" : "Wed Oct 10 20:19:24 +0000 2018", "text" : "画像3枚", "user" : { "name" : "ユーザー名", "screen_name" : "スクリーン名", "profile_image_url_https" : "http://nekodeki.com/wp-content/uploads/2020/03/logo_flutter.png" }, "entities" : { "media" : [ { "media_url" : "http://nekodeki.com/wp-content/uploads/2020/02/P6260391-2.jpg", "url" : "http://nekodeki.com/wp-content/uploads/2020/02/P6260391-2.jpg" } ] }, "extended_entities" : { "media" : [ { "media_url" : "http://nekodeki.com/wp-content/uploads/2020/02/P6260391-2.jpg" }, { "media_url" : "http://nekodeki.com/wp-content/uploads/2020/02/P6260336.jpg" }, { "media_url" : "http://nekodeki.com/wp-content/uploads/2020/02/P6260241-2.jpg" } ] }, "retweet_count" : 5, "favorite_count" : 10 } } |
assetsに追加
pubspec.yamlにフォルダを追加してリソースとして使えるようにします。
|
1 2 3 |
assets: - images/ - jsons/ # 追加 |
Jsonを読み込むためのクラスを作成する
modelじゃなくてutilにしました。
lib/util/get_local_object.dartに以下を書いて保存します。
もし他のローカルファイルを読み込むことがあればここに追加しよう。
|
1 2 3 4 5 6 7 8 9 10 11 12 |
import 'package:flutter/services.dart' show rootBundle; import 'dart:convert'; class LoadLocalJson { /// LocalのJsonファイルを読み込む /// /// [path]のファイルを読み込み、JsonDecodeした[res]を返却する。 Future getJson(String path) async { var res = await rootBundle.loadString(path); return jsonDecode(res); } } |
Twitter APIの代わりにJsonを読み込む
twitter_card_model.dartを1行書き換えてJsonを読み込めるようにします。
もとのTwitterApiModelはまた使うのでコメントアウトだけ。
|
1 2 3 4 5 6 7 8 9 10 11 12 13 14 15 16 17 18 19 20 21 22 23 24 |
import '../ui/custom_card.dart'; import '../model/twitter_api_model.dart'; import '../util/convert_text.dart'; import '../util/get_local_object.dart'; // 追加 ・・・ // final jsonData = await TwitterApiModel().getJson(_userTimelinePath, _userTimelineParam); final jsonData = await LoadLocalJson().getJson('jsons/timeline.json'); List _tweets = []; for (int i = 0; i < jsonData.length; i++){ final String _timeText = ConvertText().twitterTimetamp(jsonData[i]['created_at']); final List<String> _images = []; String _text = jsonData[i]['text']; try { // 画像URLを取得する _images.add(jsonData[i]['entities']['media'][0]['media_url']); /// textに画像1枚目のURLが含まれているので削除する if (_text.contains(jsonData[i]['entities']['media'][0]['url'])) { _text = _text.replaceAll(jsonData[i]['entities']['media'][0]['url'], ''); } for (var _url in jsonData[i]['extended_entities']['media']) { _images.add(_url['media_url']); } } catch (e) { } |
Twitter、なぜかentitiesとextended_entitiesの1枚目に同じURLが入ってる。。。
よくわからないのでそのまま追加してます。
JsonでKeyがない可能性がある情報の取得
調べたんですけど、DartってPHPでいうところのissetがない…?
変数に格納されてれば.isEmptyが使えるけど、JsonというかMapだと変数に入れようとした段階で
そのKeyないよ!
って怒られる。
==null ならよくない?と思ったけど、なぜかこれもエラー。
左辺がnullだったら代入するよ!っていう便利な??=というのがあるけど、右側がnullだったら…はないらしい。
|
1 |
padding ??= EdgeInsets.zero; |
nullチェックする方法がないわけない気がするけど見当たらないので、とりあえずTryでくくってみたのでした。
URLを置換
textに画像URLが含まれているので、画像があった場合は置換するようにしました。
ちなみにこれ
|
1 2 3 |
if (_text.contains(jsonData[i]['entities']['media'][0]['url'])) { _text = _text.replaceAll(jsonData[i]['entities']['media'][0]['url'], ''); } |
Dartのreplaceって見つからなかったときにエラー返すのかウソだろマジか
って思って追加したんですけど、単にkeyが間違ってただけというね。
if文いらないです。
そのうち消します。
タイムラインで画像を表示できるようにする
Twitterの画像は1~4枚まであるので、それぞれ表示できるようにします。
カスタムウィジェットに画像を追加する
当初はカードの種類だけウィジェットを用意しようとしてたんですが、あまりにも冗長になるのでやめました。
テキストだけのカードにImageウィジェットを呼び出す枠を作り、渡された画像の数によって返却する内容を変えてます。
|
1 2 3 4 5 6 7 8 9 10 11 12 13 14 15 16 17 18 19 20 21 22 23 24 25 26 27 28 29 30 31 32 33 34 35 36 37 38 39 40 41 42 43 44 45 46 47 48 49 50 51 52 53 54 55 56 57 58 59 60 61 62 63 64 65 66 67 68 69 70 71 72 73 74 75 76 77 78 79 80 81 82 83 84 85 86 87 88 89 90 91 92 93 94 95 96 97 98 99 100 101 102 103 104 105 106 107 108 109 110 111 112 113 114 115 116 117 118 119 120 121 122 123 124 125 126 127 128 129 130 131 132 133 134 135 136 137 138 139 140 141 142 143 144 145 146 147 148 149 150 151 152 153 154 155 156 157 158 159 160 161 162 163 164 165 166 167 168 169 170 171 172 173 174 175 176 177 178 179 180 181 182 183 184 185 186 187 188 189 190 191 192 193 194 195 196 197 198 199 200 201 202 203 204 205 206 207 208 209 210 211 212 213 214 215 216 217 218 219 220 221 222 223 224 225 226 227 228 229 230 231 232 233 234 235 236 237 238 |
class CustomCard { Widget createCard(Map tweetData) { return _CustomCard(tweetData); // IDの分岐を削除 } } ・・・ class _CustomCard extends StatelessWidget { // 名前変更 ・・・ children: <Widget>[ Container( color: Colors.yellow[200], child: _Header(_tweetData), ), Container( color: Colors.blue[200], padding: EdgeInsets.symmetric(vertical: 5), // padding追加 child: Text(_tweetData['text']), ), _Image(imageUrl:_tweetData['image']), // 画像を呼び出す処理を追加 Container( color: Colors.lightGreen[300], child: _FooterButtons(_tweetData), ), ], ), ・・・ // ここから新規追加 class _Image extends StatelessWidget { final List<String> imageUrl; _Image({this.imageUrl}); final Radius _radius = Radius.circular(20.0); final double _imageHeight = 200; final double _padding = 2.5; /// 画像に各種設定を行う /// /// [url]の画像に対して以下を設定した[Container]を返却する。 /// 指定がない場合はデフォルト値を使用。 /// [height]、[width]、[borderRadius]、[padding] Widget _imageItem({ String url, double height = double.infinity, double width = double.infinity, BorderRadius borderRadius, EdgeInsets padding, }) { borderRadius ??= BorderRadius.all(Radius.circular(0)); padding ??= EdgeInsets.zero; return Container( width: width, height: height, padding: padding, child: ClipRRect( borderRadius: borderRadius, child: Image.network( url, fit: BoxFit.cover, ), ), ); } /// 画像1枚用のウィジェット Widget _image1(){ return _imageItem( url: imageUrl[0], height: _imageHeight, borderRadius: BorderRadius.all(_radius), ); } /// 画像2枚用のウィジェット Widget _image2(){ return Row( children: <Widget>[ Expanded( child: _imageItem( url: imageUrl[1], height: _imageHeight, borderRadius: BorderRadius.only( topLeft: _radius, bottomLeft: _radius, ), padding: EdgeInsets.only( right: _padding, ), ), ), Expanded( child: _imageItem( url: imageUrl[2], height: _imageHeight, borderRadius: BorderRadius.only( topRight: _radius, bottomRight: _radius, ), padding: EdgeInsets.only( left: _padding, ), ), ), ], ); } /// 画像3枚用のウィジェット Widget _image3(){ return Row( children: <Widget>[ Expanded( child: _imageItem( url: imageUrl[1], height: _imageHeight, borderRadius: BorderRadius.only( topLeft: _radius, bottomLeft: _radius, ), padding: EdgeInsets.only( right: _padding, ), ), ), Expanded( child: Column( children: <Widget>[ _imageItem( url: imageUrl[2], height: _imageHeight / 2, borderRadius: BorderRadius.only( topRight: _radius, ), padding: EdgeInsets.only( bottom: _padding, left: _padding, ), ), _imageItem( url: imageUrl[3], height: _imageHeight / 2, borderRadius: BorderRadius.only( bottomRight: _radius, ), padding: EdgeInsets.only( top: _padding, left: _padding, ), ), ], ), ), ], ); } /// 画像4枚用のウィジェット Widget _image4() { return Table( children: [ TableRow( children: [ _imageItem( url: imageUrl[1], height: _imageHeight / 2, borderRadius: BorderRadius.only( topLeft: _radius, ), padding: EdgeInsets.only( right: _padding, bottom: _padding, ), ), _imageItem( url: imageUrl[2], height: _imageHeight / 2, borderRadius: BorderRadius.only( topRight: _radius, ), padding: EdgeInsets.only( left: _padding, bottom: _padding, ), ), ], ), TableRow( children: [ _imageItem( url: imageUrl[3], height: _imageHeight / 2, borderRadius: BorderRadius.only( bottomLeft: _radius, ), padding: EdgeInsets.only( right: _padding, top: _padding, ), ), _imageItem( url: imageUrl[4], height: _imageHeight / 2, borderRadius: BorderRadius.only( bottomRight: _radius, ), padding: EdgeInsets.only( left: _padding, top: _padding, ), ), ], ), ], ); } // 画像の数によって返すものを変える @override Widget build(BuildContext context) { if (imageUrl.length == 0) { return Container(); } if (imageUrl.length == 2) { return _image1(); } if (imageUrl.length == 3) { return _image2(); } if (imageUrl.length == 4) { return _image3(); } return _image4(); } } |
共通ウィジェットで画像の設定
画像に対する処理は大体同じなので、共通メソッドとして切り出しました。
これをそれぞれ画像の配置用ウィジェットに組み込みます。
|
1 2 3 4 5 6 7 8 9 10 11 12 13 14 15 16 17 18 19 20 21 22 23 |
Widget _imageItem({ String url, double height = double.infinity, double width = double.infinity, BorderRadius borderRadius, EdgeInsets padding, }) { borderRadius ??= BorderRadius.all(Radius.circular(0)); padding ??= EdgeInsets.zero; return Container( width: width, height: height, padding: padding, child: ClipRRect( borderRadius: borderRadius, child: Image.network( url, fit: BoxFit.cover, ), ), ); } |
実際に呼ぶ場合はこんな感じ。
|
1 2 3 4 5 6 7 8 9 |
/// 画像1枚用のウィジェット Widget _image1(BuildContext context){ return _imageItem( context: context, url: imageUrl[0], height: _imageHeight, borderRadius: BorderRadius.all(_radius), ); } |
画像を角丸にする
ClipRRectを使うと、四角い画像の角を丸めることができます。
|
1 2 3 4 5 6 7 |
ClipRRect( borderRadius: borderRadius, child: Image.network( url, fit: BoxFit.cover, ), ), |
borderRadiusにはどの角を丸めるかを指定します。
画像が1枚の場合は全部の角を丸めるので
|
1 |
BorderRadius.all(Radius.circular(20.0)) |
画像が4枚の場合は1画像につき丸める角は1つなので
|
1 2 3 |
BorderRadius.only( topLeft: Radius.circular(20.0), ), |
BorderRadiusはall、onlyの他にも種類があるので、使いやすいものを使えばOKです。
画像を要素に合わせる
Twitterの画像って、特定の範囲でクリッピングされてるんですよね。
ということで、BoxFitを使って画像を要素の形に変形します。
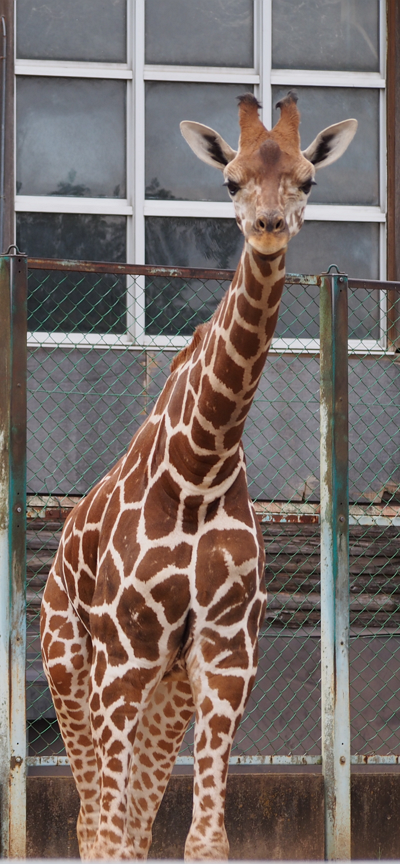
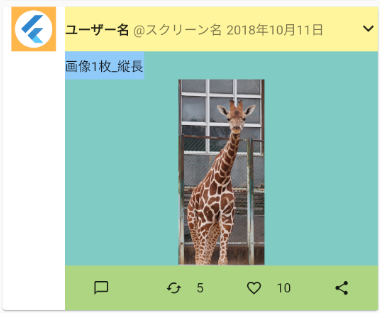
例えば、こんな感じの縦長画像があったとして
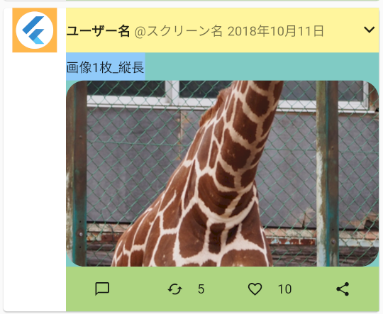
BoxFit.coverを指定するとこう。
|
1 |
Image.network( url, fit: BoxFit.cover) |
他にも枠に合わせてクシャっと押し込めるfill
幅または高さに合わせるcontainなんかがあります。
個人的にはfillの使いどころがさっぱり。
全部で7種類あるのでいろいろ使ってみてください。
Tableでグリッド配置
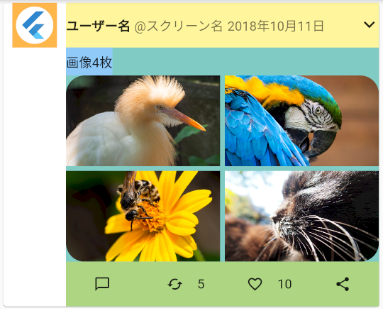
画像4枚の場合、RowとColumnを組み合わせてもいいけどちょっと冗長。
そんな場合はTableを使うとスッキリかけます。
※_imageItemの引数が多くて長いけど
HTMLのtrがTableRow。
tdがchildrenにあたります。
|
1 2 3 4 5 6 7 8 9 10 11 12 13 14 15 16 17 18 19 20 21 22 23 24 25 26 27 28 29 30 31 32 33 34 35 36 37 38 39 40 41 42 43 44 45 46 47 48 49 50 51 52 53 54 55 56 57 58 59 60 61 62 63 |
/// 画像4枚用のウィジェット Widget _image4(BuildContext context) { return Table( children: [ TableRow( children: [ _imageItem( context: context, url: imageUrl[1], height: _imageHeight / 2, borderRadius: BorderRadius.only( topLeft: _radius, ), padding: EdgeInsets.only( right: _padding, bottom: _padding, ), ), _imageItem( context: context, url: imageUrl[2], height: _imageHeight / 2, borderRadius: BorderRadius.only( topRight: _radius, ), padding: EdgeInsets.only( left: _padding, bottom: _padding, ), ), ], ), TableRow( children: [ _imageItem( context: context, url: imageUrl[3], height: _imageHeight / 2, borderRadius: BorderRadius.only( bottomLeft: _radius, ), padding: EdgeInsets.only( right: _padding, top: _padding, ), ), _imageItem( context: context, url: imageUrl[4], height: _imageHeight / 2, borderRadius: BorderRadius.only( bottomRight: _radius, ), padding: EdgeInsets.only( left: _padding, top: _padding, ), ), ], ), ], ); } |
画像1枚の時と同じサイズに収まるようにしてあります。
RowやColumnが入れ子になると結構ややこしいのでTableは活用していきたいところ。
なんですが。
HTMLと違って行や列の結合ができないという欠点があります。。。
Rowspanやcolspanに該当するものがないんですね。
なので、こんな配置にする場合はTableは使えません。
でも要望は多そうなので今後機能追加されるかな?
期待しよう。
画像がなければ空のContainerを返却
buildの中でどのウィジェットを返すか判定してます。
もし画像が1枚もなければ空っぽのContainerが返るようになってます。
|
1 2 3 4 5 6 7 8 9 10 11 12 13 14 15 16 17 18 19 20 |
@override Widget build(BuildContext context) { if (imageUrl.length == 0) { return Container(); } if (imageUrl.length == 2) { return _image1(); } if (imageUrl.length == 3) { return _image2(); } if (imageUrl.length == 4) { return _image3(); } return _image4(); } |
画像のプレビューを表示する
画像をBoxFitで変形してるのもあるし、元の画像を表示する機能が欲しい。
まぁ公式と一緒なんだけど。
ということで、画像をタップしたらプレビュー画面を表示するようにします。
プレビュー画面を作成する
新しくlib/routes/image_preview.dartを作って以下を追加。
もらった画像を中央に表示してるだけです。
|
1 2 3 4 5 6 7 8 9 10 11 12 13 14 15 16 |
import 'package:flutter/material.dart'; class ImagePreview extends StatelessWidget { final Image image; ImagePreview({@required this.image}); @override Widget build(BuildContext context) { return Scaffold( appBar: AppBar(), body: Center( child: image, ), ); } } |
名前付き引数と必須引数
コンストラクタでメンバ変数を初期化するときに{}で囲むと名前付き引数になります。
名前付き引数は省略可能なので、必須項目には@requiredを付けましょう。
|
1 |
ImagePreview({@required this.image}); |
タップしたときの処理を追加する
画像をタップしたときに画面遷移するようにしたいんですが、ImageやContainerにはonTapがありません。
そんな場合はGestureDetectorでくるみます。
GestureDetectorは結構いろいろできるので、困ったら見てみるといいと思います。
|
1 2 3 4 5 6 7 8 9 10 11 12 13 14 15 16 17 18 19 20 21 22 23 24 25 26 27 |
import '../routes/image_preview.dart'; ・・・ // プレビュー開くたびにダウンロードするのが微妙なので画像そのものを渡すようにする Image image = Image.network( url, fit:BoxFit.cover ); return GestureDetector( onTap: (){ Navigator.push( context, MaterialPageRoute( builder: (context) => ImagePreview(image: image), ), ); }, child: Container( width: width, height: height, padding: padding, child: ClipRRect( borderRadius: borderRadius, child: image, ), ), ); } |
タップで画面遷移する
onTapの中に遷移処理を書きます。
遷移先のImagePreviewには画像を渡します。
|
1 2 3 4 5 6 7 8 9 |
return GestureDetector( onTap: (){ Navigator.push( context, MaterialPageRoute( builder: (context) => ImagePreview(image: image), ), ); }, |
で。
画面遷移時に必要なcontextなんですが、_imageItemは持ってないんですよね。
どこから持ってくるかというと、buildをoverrideしてるいつものやつ。
こいつがBuildContextを持っているので、ここからもらいます。
|
1 2 3 4 5 6 7 8 9 10 11 12 13 14 15 16 17 18 19 20 |
@override Widget build(BuildContext context) { if (imageUrl.length == 0) { return Container(); } if (imageUrl.length == 2) { return _image1(context); } if (imageUrl.length == 3) { return _image2(context); } if (imageUrl.length == 4) { return _image3(context); } return _image4(context); } |
呼び出すときにも引数にcontextを追加。
|
1 2 3 4 5 6 7 8 9 |
/// 画像1枚用のウィジェット Widget _image1(BuildContext context){ return _imageItem( context: context, url: imageUrl[0], height: _imageHeight, borderRadius: BorderRadius.all(_radius), ); } |
以上で実装は完了です。
これを保存してみると…。
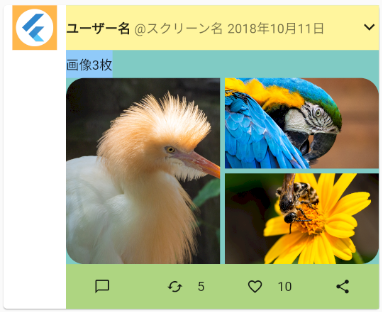
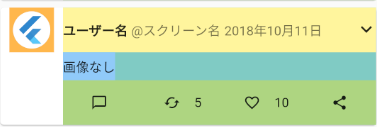
それぞれ画像が表示され、タップするとプレビューが表示されるようになりました。
Navigator.pushは遷移先にAppBarがあった場合に戻るボタンを自動で追加してくれるのが便利。
見た目はひとまず終了
本当はまだリツイートが表示されないとかあるんですが、深追いすると終わらないのでとりあえずここまで。
次はボタンをタップ→文字を入力して実際にツイートしてみたいと思います。
ここまでのソースはGitHubでどうぞ。
